2012年4月23日 星期一

FlySky FS-GT3B 2.4Ghz 3CH Transmitter Radio RC FHSS


The GT3B is an improved version of the GT3 V3 from FlySky.  See my related posts in the bottom of this review.  It uses the same receivers (RX) as the GT3 V3 as well.  It finally features a backlit LCD screen, a must have for any radio in my opinion. I also like how the screen is on top instead of the side for easy access.  It’s no longer modular based.  A good and bad thing I think.  With the original GT3, you can use any JR compatible module from FrSky, Corona, Assan, Spektrum, etc.  You’re stuck with FlySky 2.4Ghz unless you do some serious hacking on the GT3B.
The packaging for the GT3B is also reduced.  The box is now only half the size of the original GT3, which is a good thing.  Included in the box is the transmitter, receiver (FS-GR3C), and CD (VRC simulator).
Also like the GT3 V3, it features frequency hopping.   Every manufacturer calls it something different.  Futaba calls it FAAST.  FlySky calls it AFHDS.  Frequency hopping is good in that the signal is spread across multiple channels within the 2.4Ghz band.  So if one channel has interference, it merely hops to other channels to communicate.  The earlier GT3 (V1) and other FlySky radios only had one channel in the 2.4Ghz band to use.  Which was not good because if there was strong interference in that particular frequency that it was using, you can lose signal. So it’s now in the same league as Futaba/FrSky/Hitec, when it comes to using FHSS (frequency hopping spread spectrum).  Even Spektrum/JR’s DSM2 system doesn’t have FHSS ;)   But one day Spektrum will join the party too since even the little known Chinese companies are jumping on board.
Another safety feature is the fail-safe.  Out of range or when signal is lost due to interference, the throttle will return to a preset position.   The GT3B uses the same receivers, as the GT3V3, FS-GR3C.  There is a button on the receiver that you press to set the fail-safe.
To set the fail-safe:
(Please note there is only a fail-safe for channel 2.  1 & 3 do not have fail-safe)
1.  Turn on both RX and TX
2.  Hold the throttle (CH2) in the position you want it to be in when fail-safe kicks in (example: brake position).  Alternatively, you can use your throttle trim to put the throttle in brake mode, instead of holding down the trigger, it’s easier.
3.  Press the fail-safe button until it blinks and turns solid again.
4.  Test it!  Go full throttle and turn the radio off.  It should go to brake position.
The GT3B has a DSC port to plug into your PC via the FS-SM100 USB dongle.  You can use the GT3B as a game controller for games like VRC/RealRace and anything that will recognize a DirectX input, which is pretty much everything.
The menu systems is not as user friendly as the better known brands but I’ve gotten use to the Chinese’s clunky interface now.  I really like the design of the radio with the big wide screen on top.  The LED backlight is a nice touch.  I no longer have to do my own backlight mods.  I hope more radio manufacturers take note and do the same and add some sort of back light. Like all the FlySky radios, it uses the hideous 8xAA batteries.  I modified mine to use a Turnigy 11.1V LiPo battery pack by soldering some JR  leads to the +- of the battery compartment.

If you want to use a lipo battery with your GT3B instead of AA, solder a JR receiver lead to your battery terminal in the transmitter

Now plug in your lipo.  I’m using a Turnigh 3S 11.1v 1450mah battery pack from HobbyKing.
Some features like throttle and steering delay are missing from the GT3B.  As well as programmable keys.  I don’t miss it that much but it is sad when you lose features in a newer version.  Usually you get more features added not lose them.  The model memory name is also truncated.  On the old GT3, you can have 8 characters to label your model.  Like REDCAT8E.  Now with the GT3B’s limited display, you can only have 3 characters.  So now I have to use “R8E” to remember that it’s a Redcat Earthquake 8E car.  Kinda goofy, so I wished they could’ve had a higher dpi screen to show more characters.  The screen is backlit but the LED turns off to conserve power.  I’m mixed on this.  It’s nice that it saves power but when the LCD screen light turns off, I might not realize that it’s on and accidently drain it.  When the backlight goes off, you can’t see anything, it’s black.   I might have to do an EL backlight mod on this in the future like my other transmitters.
How to bind the RX (receiver) to the TX (transmitter):
1.  Plug bind plug into CH3, turn on car, the LED light should flash
2.  Hold down bind button on transmitter module while turning on the TX
3.  The light should go steady now
4.  Let go of bind button, turn off car, remove bind plug, turn off TX
5.  Turn on TX and then turn on car, it should be bound now
Specs:
- AFHDS (automatic frequency hopping digital system), is developed by FlySky for all the Radio Control model lovers. The system is specially developed for all the Radio control models, that offers super active and passive anti-jamming capabilities, very low power consumption and high receiver sensitivity.
- Channels: 3 Channels
- Model type: car/boat
- RF power: <=10mW
- System type: AFHDS
- Modulation: GFSK
- Sensitivity: 1024
- Low voltage warning: yes (less than 9.5V)
- 3.9″ LCD display
- Contains antenna
- Contains 3.5mm DSC port & Charger port
- Power by 8*AA batteries (not included)
- Comes with CD drive + 2.4G receiver

Pete's Overkillrc Hacked GT3B review, with programming write up

Here is my full review of the Overkillrc hacked Fly sky FS-GT3B.


First, we'll start with the packaging of the radio itself. Mine is a pre-hacked 8 channel model, and after opening the nicely printed (albeit mostly Chinese) box, I'm greeted with nice Styrofoam molded around the radio, receiver , and computer connection cord. I like that I can use this as a transport box if I want to in the future.


The radio features a drop wheel stock, for me its dead on for positioning. The wheel is wrapped in a soft rubber, and has a nice amount of spring to it, it does get a bit bouncy when released from full lock, but I hardly ever just let go of the wheel entirely. The trigger is again nicely positioned and is very soft in pull. There is a small amount of mold flash left on mine that I'll take a hobby knife to eventually. The grip itself has a pebble texture on the palm side, and feels nice and solid. The buttons on the radio all have a nice firm click to them when pressed, only exception being the adjustment wheel, this has a softer click as you turn it and a nice click when pressed. The power button located on the rear of the radio is easy to access, yet hard to press accidentally, major plus in my book. The antenna lays flat nicely next to the rather large screen for adjustments, and does not swivel as seen in the spektrum dx3e I came from. I do worry slightly about leaving it up, my dx3e has been put down with the antenna up, and the swivel has kept it from breaking. Pretty minor though since this radio will spend the majority of its life piloting a crawler, and I don't need the antenna up for a 5 foot distance. The channels you have ordered/put in dictate how many model memory you have, my 8 channel has 12, a 6 channel would have 14 and a 3 channel has 14.


On turning on the radio, I notice the nice backlit screen immediately, the pleasant blue highlights the screen features.


In the basic menus that have nothing to with it being hacked, you have a model selection menu (MODEL), a model renaming menu (NAME), servo reversing menu (REV), a channel end points menu (E. POINT), a trims menu (TRIM), a dual rate menu (D/R), an exponential menu (EXPO) and lastly, and anti-lock braking menu (ABS). These are pretty self explanatory, except for the ABS menu. The anti-lock brakes “pump” the brakes just like your ABS equipped car does, and this has a slow, normal, and fast setting. !Important! A long hold on NAME will reset the model you are currently working on! Great for when you get a new vehicle, but be careful with it.


Now to get into the hack features, this is a fairly involved read, but I will try to make it easier than the manual, and also, Losikid's video of programming should help out as well.


The REV menu: a long hold on enter takes you to the channel mapping menu. This maps radio functions to different buttons, and also lets you set the parameters of that button. We'll start off with a run down of the different buttons and button groups.


button groups, these can be set to do many things, most important being a 3 position switch:


1........these are the steering trim buttons
2........these are the throttle trim buttons
3........this is the 3rd channel trim slider on the grip
d........this is the dual rate slider on the grip.


The 3rd and dual rate sliders aren't truly sliders, they are buttons activated by a sliding motion, therefore I refer to them as sliders.


The single buttons are for less involved tasks like turning a light group on or off, and also I can see a use for shifting a 2 speed transmission such as a summit transmission.


C........this is the grip button located underneath the 3rd channel slider, roughly shaped like a C
e.........this is the end button located above and to the right of the adjustment wheel
b.........this is the back button located above and to the left of the adjustment wheel


now to get on to button and button group functions. This is where the read gets involved, and where I'm doing a re-write of the manual to make things more clear.


These are the general functions of the trims and dual rate sliders. This setting dictates what 1,2,3, and d will actually control


OFF..........................the individual buttons of the button group can be assigned as individual buttons
TR1, TR2.................steering and throttle trim respectively
DRS, DRF, DRB.....dual rate of the steering. DRS is general, DRF is forward dual rate, and DRB is backward dual rate.
EXS, EXF, EXB.....expo of the steering, same thing as the dual rate, the first is overall expo, then F and B are forward and back.
CH#........................button group would control an individual channel, say the 3rd channel for a mechanical or electronic dig unit.
ST#.........................button group controls the sub-trim of a channel
4WS.......................controls the 4 wheel steering mix that will be covered in a later section
DIG........................controls the dual esc dig function, covered in a later section as well
MPO......................multi position, switches the position up or down
SST........................steering speed while turning
SSR.......................steering speed while the servo is returning to center.
CS#.......................channel speed for a given channel number.


The general functions of individual buttons are
OFF.......................self explanatory
CH#.......................instantly switch the value from maximum to minimum
C#R.......................instant reset to center for a given channel
4WS......................switch between crab (CRB) and no crab (NOC) in for four wheel steering setups
DIG.......................switch dig mix between -100 and 100
DGR......................dig mix is returned to center
MPO.....................switches the multi position up one
MPR......................multi position reset
LCI........................lap counter increase
LCR...................... lap counter reset


The basic functions of 1, 2, 3, and d are:


MOM......this is a momentary hold. When you let go of the button, the servo would return to center, or your electronic dig would go from front or back lock if you so desire. I personally like this setting for the dig unit in my Losi.


NOL........no long key, the button will only act as a short press.


RPT.........the button will auto repeat, using this would allow you to set say a 20% step on your dual esc setup for proportional digs, or for active control of rear steering. 


RES.......long hold resets to center value


END......long hold goes to end point


After selecting one of these, you will be taken to the step setting, this is where you would set how much step you would want to have in a rear steer or dual esc setup. This is not the end point! Adjustment is made by turning the adjustment wheel.


After setting your step and pressing enter, you're taken to the reversing menu of that function


NOR.....no reverse


REV.....reverse buttons


for anything other than MOM there is the opposite reset menu next.


NOO.....no change
ORS......when a key is pressed, and the current value is on the other side of center, it will return to center.


MOM has a unique function to go back to the previous value or to follow the step setup earlier.


NPV....no change from your previous settings, meaning it would return to center on release.
PRV....this would return to the previous value before pressing that button. Meaning if you had it at negative 100, it would go from positive 100 to negative 100 on release.


Now we head over to the TRIM menu and after a long hold, that will start flashing, you've now entered the subtrims menu. Simply select the channel you want to trim up a bit more and adjust it to your liking.


The channel speed menu is accessed by a long hold on the D/R menu. When in this menu, you can set the speed and return speed of any channel. To switch from turn (left arrow displayed) to return speed (right arrow displayed) simply turn the steering wheel.


A long hold on the E. POINT menu will bring you to the mixes menu. This is were you would setup the mix for four wheel steer or dual esc dig. The mixes are:


4.......four wheel steering
d.......dual esc dig mix


For both dual esc and four wheel steering mixes you set the “slave” channel, or in other words, the channel the other servo or esc is on. After you select that channel and press enter, you'll set a number on screen, this is the range number of the mix. 0 is the default setting, both esc's/servos will have the same maximum steering or throttle. A setting of 100 will reduce the rear steer/throttle by 100% and -100 will reduce the front steering/throttle by 100%


4 also has a special setting of crab (CRB) or no-crab (NOC).


P......Multi-Position mix. This allows you to set up a multi-position switch with up to 8 positions, basically you set the first position, press enter, set second position, and repeat for as many positions that you want up to 8, when you're done, press END.


b.... Brake cut-off. This is used mostly for forward only boats to my understanding, set to off or cut.


Calibration menu. To enter this menu, hold the steering wheel right and long hold enter.


6 of the screen fields will start to blink


to calibrate, you would set the minimum, center, and maximum values of the radio. For channel 1, turn full left, press enter, then back to center, press enter, then full right, and press enter. All fields in the top row should have stopped blinking. Repeat same process for channel 2 (throttle)


to calibrate battery, select channel 4, press enter, set the measured battery voltage, and press enter to save or end to not. 


To exit the calibration menu, long hold either back or enter.


Key test menu. This is a useful troubleshooting tool to find faulty keys.


Hold wheel left and then a long hold on enter to access this menu and press each button. Any faulty ones wouldn't change value. When a button is pressed to a long hold, L will appear.


Either long hold back or enter to exit.


Global or Advanced menu as I call it. This menu deals with the non-model specific functions of the radio. To access, simply long hold enter with no fields highlighted. The fields MODEL and NAME will blink.


use the adjustment wheel to scroll through this menu, and either a long hold on back or enter to exit, values will be saved


F............................firmware version, just info here
L............................backlight time-out
A...........................inactivity alarm, useful to those of you running lipos and also if you forgot to turn off your transmitter.
LOW POWER!....where you want your low power alarm to go off. 
E. POINT..............maximum allowed endpoint, for servo safety, it is not recommended to go past 120%! a d will flash if you exceed 120%
1............................dead band for steering, 0-50
2............................dead band for throttle, 0-50
b............................key beep, on or off
d............................long hold delay, measured in milliseconds, this goes from 100-1000
r+ALL...................global reset, select YES to set all global (advanced) and all models to defaults
r+MOD................. reset all models.


After getting all of this setup, I find that the radio is stellar at controlling a crawler and my vendetta mini buggy. For my crawler I have the channel 3 slider set to momentary to control digs, and I really like being able to quickly switch it on and off, very helpful little setting. I also have my throttle expo on the dual rate slider. This I really like, I can adjust the throttle curve on the fly basically, from very slow crawls to full out speed in under a second with fine control. Very handy imo. I also have the steering turn speed and return speed on the steering and throttle trims respectively. This allows for a slower response from my very quick savox servo, I have hand tremors and they would show up in my steering, and have cost me a couple parts because of it, with a slightly slower speed on both, I can dial out the tremor.

For my vendetta, I have abs on slow, and then expo on the 3rd trim, and dual rate stays on the dual rate. I haven't had to turn down the steering since I'm running an older analog servo in there, but turning down the dual rate at higher speeds is great, and I don't have to move my hand to do it. Also, I like smaller technical courses and the instant expo adjustment is great for going from turn sections to straights. 


Pros and cons time:

Pros: very versatile radio (really can do about anything), easy to use and program, up to 8 channel control with proper receiver, in my hands its very comfortable, well balanced, feels solidly built, tiny receivers, and most important to me, the price of the transmitter and receivers are low.

Cons: the sliders could use a redo (they are a little short) the antenna could be better on the rx's (its 2011, I don't need that 6 inch antenna sticking out anymore), I would like if the antenna on the radio swiveled, ball bearings on the wheel (has been addressed I know, but should have been a fs factory thing). 8 aa's get expensive, the screen is almost unreadable with the backlight off, a bind button on the receivers instead of those easy to lose bind plugs, its a bandwidth brute (kills the house wifi every time I use it), and a slightly bigger trigger would be nice.

Losikid will be doing videos this week.

I hope that this is helpful

Pete

2012年4月22日 星期日

FLYSKY RC Model FS-GT3C 3ch 2.4GHz LCD GT3C Transmitter & GR3C Receiver TS897


New Arrival! FLYSKY RC Model FS-GT3C 3ch 2.4GHz LCD GT3C Transmitter & GR3C Receiver TS897


FLYSKY RC Model FS-GT3C 3ch 2.4GHz LCD GT3C Transmitter & GR3C Receiver TS897
Available at www.hobbyhot.com - ship to worldwide

Introductions
AFHDS (Automatic Frequency hopping Digital System), is developed by FLYSKY for all the Radio Control model lovers and is patented by FLYSKY at home. The system is specially developed for all the Radio control models, that offers super active and passive anti-jamming capabilities, very low power consumption and high receiver sensitivity. With extreme rigorous testing by engineers and studying the markets for years, FLYSKY AFHDS is now considered to be the one of the best systems available in the markets.


Specifications
Channels: 3 Channels
Model type: Car / Boat
RF Range: 2.40 - 2.48GHz
Bandwidth: 500Hz
Band: 160
RF Power: Less than 20DB
2.4G System: AFHDS
Code type: GFSK
Senditivity: 1024
Low Voltage Warning: Yes (Less than 3.7V)
DSC Port: Yes (3.5mm, Output: PPM)
ST Range: 90
TH Range: 45 (F:30, B:15)
Charger Port: Yes (USB)
Power: 3.7V (800mAh)
Weight: 346g
ANT Length: 98.5mm
Size: 151 x 183 x 116mm
Certificate: CE, FCC

Package Includes
1 x FS-GT3C Transmitter
1 x FS-GR3C Receiver
1 x Charging USB Cable
1 x 800mAh 3.7V Transmitter Li-Po Battery
1 x Extra Handle (Large Size)
1 x English Manual CD
1 x Color Box


Remote Controlled Toys Online Shop: www.hobbyhot.com
We highly recommend the follow RC TOYS model, We accept Wholesale order worldwide, We also sell onEBAY.COMaccept PAYPAL and Credit Card
Walkera HM-38-Z-28 Transmitter USD69.70 only
Walkera HM-4G3-Z-23 Tail Motor Holder USD4.30 only
RCS Model Bearing Set for TAMIYA RC BRUISER BG518 USD21.90 only
HobbyHot 3.5mm Golden Bullet Connector x 20 pairs AC014 USD5.90 only
Towerpro SG90 Gear Set USD1.20 only
RCS Model FR156ZZ High Precision Bearing (4.762x7.938x3.175mm, 10pcs) CS412 USD8.90 only
LEOPARD 2040 13T KV4450 2 Poles Brushless Motor IM012 USD21.90 only
RCS Model MR85 High Precision Bearing (5x8x2mm, 10pcs) CS796 USD4.90 only
RCS Model Bearing Set for MUGEN RC MST-1 1/10 GAS TRUCK w/CLUTCH BG263 USD12.90 only
OS Engine Glow Plug P3 GP010 USD9.90 only
Flyermate Hexagon Screwdriver 1.5mm SD002/TBHS001 USD2.00 only
Flyermate Atlantis 100A 3A BEC Waterproofing ESC EC153 USD23.90 only
RCS Model 685ZZ High Precision Bearing (5x11x5mm, 10pcs) CS675 USD5.90 only
Katana EP Electric Plane Kit USD85.10 only
Walkera HM-5#8-Z-02 flybar set USD7.90 only
RCS Model MR62ZZ High Precision Bearing (2x6x2.5mm, 10pcs) CS842 USD8.90 only
HobbyHot Warplane Pilot RC Model Pilot for plane SP008 USD6.90 only
APC 10 x 10 Nitro Composite Propeller PA036 USD3.90 only
2 x RCS 2080mAh 7.4v 20C LiPo Li-Polymer Battery CB006 USD22.60 only
HobbyHot 9257 25 Grams Servo x 4 pcs + Checker CB068 USD48.90 only

2012年4月17日 星期二

Coming Soon! FS-GT3C 2.4G 3CH Gun RC System Transmitter


Just received a proto GT3C from Hobbyhot.com, and it is an extremely nice radio comapred to the gt3b.

Unfortunately still no word when they are released to the public.

These claims are true of my radio, i'm unsure what the productions will be like.

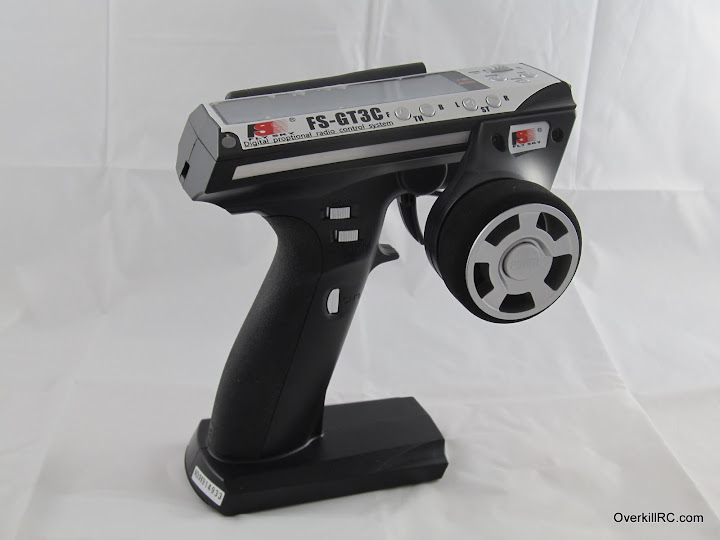
So to start off with, the general fit and feel is good, it feels like a solid radio. Part of this is because it Flysky took ergonomics somewhat seriously. Also, the gt3b looked very cheep as well as felt that way, but the new gt3c has alot better appearance to it. It has nice sleek curvers and they ditched the chrome for a nice matte silver

Here's a picture right out of the packaging (i didn't get retail packaging, just wrapped up in bubble wrap)

Click the image to open in full size.

The first noticeable thing, compared to a gt3b, when picking up the radio is how it fits the hand. My radio had 2 rubber hand grips included, one was labeled S and one was labeled L (small and large i suppose). It may be because i have small hands, but the S size felt more comfortable. It has more curvature for the palm and has a deeper pocket for my thumb to fit in. The rubber isn't a soft silicone like the spektrums, but it is softer than hard plastic and has a nice texture to it. Defiantly a nice addition

Click the image to open in full size.

Click the image to open in full size.

Continuing on with the handle, the buttons are alot easier to use. I'm unsure why at te moment, but i do know that the d/r is alot easier to use now because they radio has alot more clearance in that area for the thumb to bend and pull it back

The next area of interest is the steering wheel and its support column.

Flysky upgraded the hard rubber into a nice foam grip. But the most notable feature is that the power button is in the center of the wheel

Click the image to open in full size.

And the rumors are true, the GT3C runs off a 1300mah custom 1s LiPO, which gives the radio a nice balance and makes it extremely light. It even comes comes with a charger, however i got like a European plug. After reading the manual though, it seems that it can be charged in the radio with a usb cable.

Click the image to open in full size.

Click the image to open in full size.

Click the image to open in full size.

Click the image to open in full size.

Click the image to open in full size.


I mentioned a usb above, well the gt3c has a built in usb, which is intriguing. The manual says its just for charging though...also as you can see a area was added to clip on a neck strap

Click the image to open in full size.

Click the image to open in full size.


Now for the tear down


____


Ok, so i also did a basic tear down, i haven't really inspected anything yet.

First thing i did was pop off the power button. It apperas there is two screws and center push holding the wheel on

Click the image to open in full size.


back side of the wheel, it has a massive mounting shaft...

Click the image to open in full size.

Click the image to open in full size.

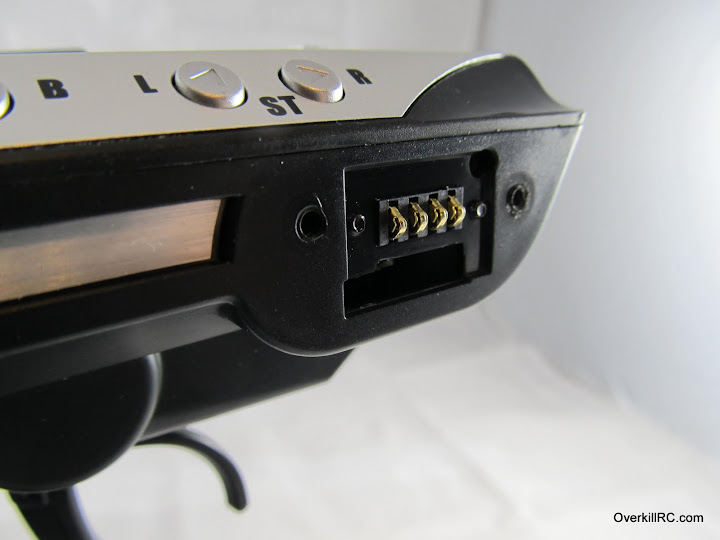
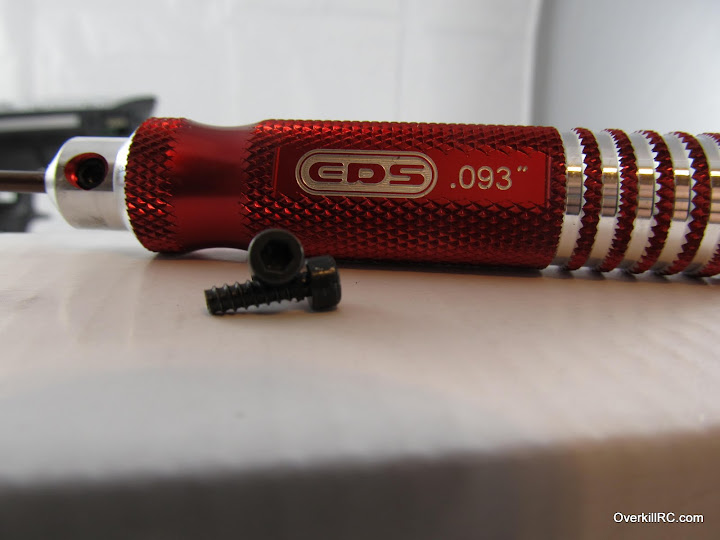
Now, another interesting thing is that the wheel is not connected to the radio via wires, it has some gold fingers and pogo/spring pads. Best of all its connected with some very aggressive socket heads.

Click the image to open in full size.

Click the image to open in full size.

Click the image to open in full size.

After that "awe" moment, i started to try and figure out how the top came off, and it appears not only has flysky improved the body, its nice underneath as well. Flysky has only two screws and two plastic latches/clibs holding the top on. The screws are on the far back hidden by little rubber inserts, and the plastic latches are similar to the gt3b, but alot more brittle and harder to unlatch (i broke one  ) After taking its top off it was surprising to see that the whole main board was attached to it.

(rubber inserts are on far left, take note of the same crappy screen, but it doesn't have the blue tint)

Click the image to open in full size.

Click the image to open in full size.

The first thing i noticed was that the antenna is now not a problem when you open the radio, and it appears to me that it be alot easier to fix if it did get pulled off...later i also realized that the 2.4 module is built into the main board, i need to research and see if it still runs off ppm

Click the image to open in full size.

Click the image to open in full size.

Click the image to open in full size.

Now i took alook at the main IC, it is indeed labeled the same as the ones in the gt3b (i took the picture before i scratched off the paint)

Click the image to open in full size.

USB/power area

Click the image to open in full size.

Interesting area, possibly for programming, but why so many holes?

Click the image to open in full size.

Click the image to open in full size.

I then pulled the top plastic off

Click the image to open in full size.

Click the image to open in full size.

and the pocket for all of it

Click the image to open in full size.

This all i got for now, feel free to ask questions. 
losikid is offline  

Product Available at www.hobbyhot.com


Detailed Product Description


1.FS-GT3C 2.4G 3CH Gun RC System Transmitter/Controller for RC CarTransmitter/Controller for RC Car 
2.-Channels:3 Channels; 

Features
-FS-GT3C 2.4G 3CH Gun RC System Transmitter/Controller for RC Car X 1
Product Details
1,Channels:3 Channels;
2,Model type:car/boat;
3,RF range:2.40-2.48GHz;
4,Bandwidth:500Hz;
5,Band:160;
6,RF power:less than 20DB;
7,2.4G system:AFHDS;
8,Code type:GFSK;
9,Senditivity:1024;
10,Low voltage warning:yes;
11,DSC port: yes(3.5mm:output:PPM);
12,ST range:90;
13,TH range:45(F:30;B:15);
14,Charger port:yes;
15,Power:3.7V DC;
16,Weight:330g;
17,ANT length:86mm;
18,Size:151*183*116mm;
19,Color:black;
20,Certificate:CE,FCC;

Item Packing

FFS-GT3C 2.4G 3CH Gun RC System Transmitter/Controller for RC Car  X 1 Set
-English Manual X 1